Showing posts with label Dessert. Show all posts

Saturday, May 26, 2012

Mohonk Mountain House's Heirloom Berry Buckle

                                                  Renny Northrop 1943-2012
This post is dedicated to a very dear friend, Renny Northrop. She lost an 18 month battle with cancer this past March. I have known Renny and her family since my childhood. Renny was a unique and wonderful person, with many friends and lots of good qualities. She is very sorely missed.

Amongst many other things she enjoyed, she loved desserts! Yet somehow she always managed to keep her girlish figure. She also loved Mohonk Mountain House in New Paltz, NY. It was one of her favorite places to visit. (http://www.mohonk.com/) She brought this recipe home with her after one of her visits to Mohonk.

Please enjoy this recipe in her honor!
 And always remember to show the people in your lives how much you love them.

Heirloom Berry Buckle

2 cups flour
1/2 cup butter
1 cup milk
4 tsp. baking powder
2 cups sugar
4 cups fresh berries -any combo of raspberries, blueberries, blackberries, or strawberries. (Frozen berries may be used, but must be heated first.)

Directions:
Preheat oven to 375 degrees. Grease a 9 x 9 inch pan. Cream butter and 1 cup of sugar. Add dry ingredients and milk alternately.


Mix berries and remaining sugar, then pour on top of cake batter. Bake for about 40 minutes. When cooked, some berries will be on the bottom. Serve as is, or with whipped cream or vanilla ice cream.
Please share this post with anyone who knew and loved Renny. Or that might love the Berry Buckle!!

Wednesday, February 8, 2012

Quick Bites: Mom's Icebox Cake

There are certain foods that just instantly bring back fond memories of being a kid, aren't there? For me, my Mom's Icebox Cake is definitely one of them.
Image Detail

 I am thinking it was called Icebox Cake because instead of baking it, you let it sit in the refrigerator to set. Then it is ready to serve. I asked my Mom to make it so I could take a picture of it and share the recipe with you, my foodie friends! It's fast, easy, and delicious!

MOM'S ICEBOX CAKE
One box of graham crackers (Mom uses plain)
Two boxes of cooked (or instant) pudding, prepared as directed (Mom uses butterscotch)

Then just cover the bottom of a 9"x13" Pyrex baking dish with a thin layer of pudding. Then cover the pudding with a tightly fit layer of graham crackers. Continue alternating layers of pudding and graham crackers until there are 3 layers of pudding and 2 layers of graham crackers (pudding on top and bottom). Then let it sit in the fridge for a few hours, slice into squares, and serve with whipped cream.

Mmm, now that is good!

NEXT POST: Dee-Licious Sri Lankan Dinner!!!!

Sunday, January 22, 2012

YUMLICIOUS PUMPKIN TRIFLE

This blog post is ode to my dear friend Jayne. She is a very self-sacrificing person and does many wonderful things. On top of all that, she makes a killer Pumpkin Trifle! I tried it many years ago, and it was love at first bite. Recently she prepared it for us again. This tasty dessert screams "comfort food"! It's perfect for Fall and Winter months, while sitting in front of the fire with a blanket and some hot cider.
If you don't have a trifle bowl, do get one! They can be found at many stores for around $15. Besides being great for trifle,they make wonderful bowls for fruit salads, etc; a worthwhile investment! Here is Jayne's secret recipe:
PUMPKIN TRIFLE
1 Trifle dish (see photo)
1 package gingerbread cake mix, prepared and baked
1 3oz pkg butterscotch pudding, instant
( I couldn't find instant so used cooked type and cooled)
1 (15oz) can pumpkin
1 ts. cinnamon
1/4 teaspoon each ground ginger, nutmeg and allspice
l (12oz) whipped topping.
After gingerbread cake is baked, cool and then crumble.
In a bowl whisk pudding ingredients together until slightly thickened. Let stand until soft set. Add pumpkin and spices.   Alternately layer cake crumbs, pumpkin/pudding mixture, whipped topping, etc. until trifle bowl is full. Chill and serve cold. Makes 12 to 15 servings. Yum Yum!!!

Sunday, June 5, 2011

BLING PRETZEL RODS

The first time I laid eyes on these little goodies, I was spying around at the Far Hills Steeplechase (see blog post: http://fifisfinefoods.blogspot.com/2010/10/newsflash-fifi-finds-fabulous-food-and.html)

What a fun, portable treat, right?! Then recently my friend Marion brought over a huge box full of chocolate covered pretzels! She found them at a bakery called Randazzo's in Raritan, NJ. They were the classic pretzel shape, coated with chocolate, and an awesome variety of tasty, "Blingy" toppings. By the time I got my camera ready to take a picture of these fabulous treats, this is all that was left on the platter... :-(
But anyway, you get the idea... they were very popular.
Posted by Picasa

I recently decided to attempt making them myself. It was surprisingly easy an fun! Here is all you need to get started:

                                  A Bag of Semisweet Chocolate Chips
                                                           (sorry, no photo)


                                                       Pretzel Rods


Your favorite toppings (I used heath bar chips, sprinkles, and ground up Peanut butter chips)


You will also need a cookie sheet, waxed paper, baking parchment, or Silpat liners.


                                             First, melt the chocolate chips.
Then, dip the pretzel rods into the melted chocolate chips. Scrape the majority of the chocolate off of the pretzel rod with a plastic spatula.
               Roll in the topping of your choice (on the wax paper, Silpat, or parchment).
Transfer to cookie sheet (also lined with wax paper, Silpat, or parchment) and place in your freezer for about 10 minutes.

               Remove from freezer, and they are ready to serve or store for later.

                      HOW EASY AND YUM IS THAT?!
I have also since tried coconut (which turned out fab) and I plan to try chopped nuts, coarsely ground M & M's, and who knows what else! Let me know if you come up with any other good, "Blingy" ideas for toppings.

                          Ciao for now, Foodie Friends!


Saturday, April 2, 2011

Honey Poached Pears with Raspberry Sauce (Natirar)

Recently, my husband and I were privileged to attend a Super foods Cooking Class! It was held at the Viking Cooking School at Ninety Acres. (www.natirar.com) We really learned a lot, enjoyed a delicious meal (with wine pairings!) and came home with some wonderful recipes to try, all bursting with healthful vitamins, nutrients and antioxidants.

I decided to try the Honey Poached Pears with Raspberry Sauce recipe first. It's presentation is lovely, and it was a perfect finish to a dinner with our Aussie friends.

Ingredients for the Honey Poached Pears:
8 medium pears (firm but slightly yielding to pressure)
6 cups aromatic white wine of drinkable quality (I used Riesling)
1 1/2  cups water
2 medium vanilla beans
2 1/2 cups honey  (I know...it's a lot, right?)
1 1/2 cups granulated sugar
6 tablespoons balsamic vinegar
16 black peppercorns, cracked
4 whole cloves
4 cinnamon sticks
2 (3 inch) pieces of fresh ginger, peeled and thinly sliced

Directions for Honey Poached Pears:
Cut the bottom 1/8th inch off of each pear to create a base.
Using a melon baller, core the pears by scooping out the bottom center of the pear. Continue scooping until all of the core and seeds are removed (about the middle of the pear.) Be careful not to scoop too far up or the pear will tear apart. At this point the pears should look whole on the outside but with a somewhat hollow core.
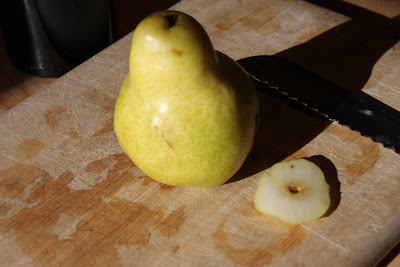
After all of the pears are cored, carefully peel them with a vegetable peeler, leaving the stems intact.  (Just pretend you see a stem on the pear below, OK?)


Pour the wine and water into a pot just large enough to hold all the pears. Split the vanilla beans in half lengthwise and scrape the seeds into the pot. Add the honey, sugar, balsamic vinegar, peppercorns, cloves, cinnamon sticks, and ginger to the pot. Bring the wine mixture to a boil. Then reduce the heat, and simmer for about 10-15 minutes.

Add the pears to the syrup, and cook at a very low simmer (poach) until they are just tender when pierced with a very sharp knife. Turn the pears as needed to evenly cook on all sides.
Allow the pears to cool in the syrup for increased flavor, but no longer than 3 hours or the pears will turn brown. Serve warm, cold, or at room temperature in a pool of raspberry sauce adorned with a sprig of mint for an attractive presentation (optional).

Ingredients for Raspberry Sauce:
2 cups thawed frozen raspberries
6 tablespoons honey
6 tablespoons orange liqueur
Mint sprigs, for garnish

Directions for Raspberry Sauce:
Combine the raspberries, honey and liqueur in a mini food processor, puree until smooth. Raspberry sauce can be made up to one week in advance, store tightly covered in refrigerator.

        Aren't they all just the cutest little delicious soldiers, all in a row??!!!

Saturday, February 19, 2011

ACQUA PAZZA or How to Feel at Home in California

If you ever have the pleasure of visiting the San Fransisco Bay area, you'll find that there is no shortage of great places to eat out! We were "out west" just a few weeks ago to visit our new niece. While we were there, one restaurant in particular stood out to me as extremely blog-worthy. Acqua Pazza.

 Acqua Pazza is located on 3rd Avenue in San Mateo. From the minute we walked in, I felt an elegant yet cozy vibe in this two story establishment. Acqua Pazza is tastefully decorated, and we were warmly welcomed by two of the owners, Tullio and Enzo Rosano. Our table service was impeccable, and the friendliness of the staff made us feel right at home.
The menu offered several specials to choose from, and we shared a few delicious appetizers at the table. Then we moved on to dinner entrees... I was in the mood for some Homemade Ravioli with Fresh Pesto Sauce. It was everything I was hoping it would be! True comfort food, Italian style. (Plus plenty of leftover Pesto, to mop up with my warm Italian bread.) Mmm....
A few others at the table chose Mamma Carmella's Homemade Gnocchi. It was served with Tomato Sauce, Mozzarella Cheese and Fresh Basil. They licked their plates clean!

The fish special of the night was a Mediterranean Sea Bass (whole fish) better known as "Branzino". I am not a fan of whole fish entrees, but my husband and my daughter are huge fans and both ordered it with gusto.When the time came that they served us our entrees, we were happily surprised that Tullio and his assistant Vittorio offered to fillet the fish for us! I snapped a photo after they had already gotten started removing the head and tail.


Here you can see Tullio quickly filleting the fish with a smile. It takes talent, to do it so quickly yet so efficiently!
Here is Vittorio, working his magic at the same time. These guys really know what they are doing!
Dinner was a complete success, and all in such a lovely, friendly atmosphere. Just when we thought we had no more room in our stomachs, Tullio brought us a warm calzone...filled with Nutella and sprinkled with powdered sugar.
(Um, Hello....is it even possible for the words "Nutella" and "calzone" to really be in the same sentence?) It tasted SO GOOD!! I felt as if I needed to close my eyes to truly appreciate the flavor...Semplicemente Fantastico!

In keeping with true Italian tradition, we were not rushed from our table; but were allowed to linger,  and we shared an after dinner drink while listening to the soft Italian music by candlelight. It was as if the Rosano family were our new friends, even sharing a goodbye hug and kiss as we left.

Here is a link to their website:  http://www.acqua-pazza.com/ They will be opening another restaurant soon. Hmm, I wonder if we can convince them to open one in New Jersey....

Tuesday, January 25, 2011

Who's Got Cabin Fever?


OK Peeps, who out there isn't feeling just a tad bit "doughy" lately... with all this blustery weather, darkness, blah blah blah??? I for one, am feeling it for sure! I just want to wear a big sweater, socks and slippers until say... April. (along with a warm cup of herb tea and a hot water bottle......C'mon, you KNOW that sounds GOOD!) But that may not be a viable option...

 So anywhoo, my Plan B is to think positive, enthusiastic, and festive thoughts! Let's have a Cuban Dinner Party!!!


Many years ago when I had my first Mojito....it was in South Beach Miami, Florida, where you can easily find authentic Cuban cuisine. Ever since then, (when I also fell in love with the Traditional Cuban Sandwich,) I have been experimenting, and putting together a foolproof menu for an awesome Cuban dinner. It's a great way to feel "warm & tropical" in the dead of winter. It makes a very nice Superbowl menu, too! Ricky Ricardo would be proud.


CUBAN DINNER PARTY MENU
Mojitos
Cuban Sandwiches
Cuban Salad
Black Beans & Rice
Garlic Plantain Chips 
Tres Leches Cake
For Cuban Sandwiches:
1 lb. deli ham, sliced thick
1 lb. roast pork, sliced thick (You can roast & slice it yourself if you cant find it at your deli)
1 lb. Munster cheese
8 submarine rolls, split
Jar of Dijonnaise mustard
Dill pickles, sliced lengthwise (you can usually find them jarred this way in the grocery store)
Butter, softened

Butter both sides of submarine rolls, then put mustard on one side of each roll. Layer Ham, Pork, Cheese and Pickle slices onto rolls. Then top with the other half of the roll.

Cuban sandwiches can be cooked using a Panini/Grill Press, a George Foreman Grill, or even just a skillet.

If you are using a skillet, butter the bottom of the skillet and place sandwiches into skillet. Then weigh it down with another skillet (cast iron if you have it). Rolls should be golden brown and cheese should be melted. Let cool for one minute, slice and transfer to serving platter.

Easy Cuban Salad:
Baby Lettuce Greens
Avocado slices
Thin red or yellow onion slices
salt
olive oil
lime juice
Arrange a bed of lettuce leaves, slice on avocado, onion, salt, olive oil, and a squeeze of lime juice. All these ingredients are to taste, so you can flavor it up or down to your liking.

Tres Leches Cake:
2 cups cake flour
2 tsp baking powder
1/2 tsp salt
6 large eggs, separated
2 cups granulated sugar
2 teaspoons vanilla extract
1/2 cup whole milk
1 14oz. can sweetened condensed milk
1 1/4 cups heavy cream
1 14 oz can evaporated milk
2 tablespoons light rum
Spray bottle of whipped cream
Cinnamon for sprinkling
Maraschino cherries (optional)

Preheat oven to 350 degrees. Grease and lightly flour a 9 x 13 baking dish. Stir flour, baking powder and salt together.
Separate the egg yolks from the whites. Beat the whites until very foamy and frothy. Set aside.
In large mixing bowl, cream the sugar, egg yolks, and vanilla extract with an electric mixer. Continue mixing and slowly add the milk. Then start adding the flour mixture, a little at a time until all the flour is incorporated and and the batter is smooth. Finally, use a spatula to gently add the beaten egg whites until completely mixed.
Pour batter into floured and greased baking dish. Bake for 40-45 minutes, or until a toothpick stuck in the middle comes out clean. Allow cake to cool on wire rack for 10 minutes.
Then invert the cake onto a baking tray with a raised side, (something to catch the syrup.) Repeatedly pierce the top of the cake with a fork.

Milk Syrup: Whisk together the sweetened condensed milk, evaporated milk, heavy cream, and rum in a bowl until well blended. Pour syrup over cake a little at a time, until it soaks through the cake. Use your fork to enable the syrup to seep into the cake. There will probably still be a pool of syrup around the bottom of the cake, but it will gradually soak in. Cover the cake in plastic wrap and refrigerate for at least 3 hours, preferably overnight.
When it's time to serve, slice a square piece of cake, spray with whipped cream, sprinkle with cinnamon, and top with a cherry (optional). You will not believe how good this cake tastes.


 As for the rest of the menu, it's all stuff you can purchase! You can also eliminate an item or two if you would rather do a little less work. Here are some tips: I buy canned Black Bean soup, heat it up, and drain off the excess liquid for my black beans.I serve it in a bowl alongside some white or brown rice. They are side dishes that compliment the sandwiches perfectly.  Goya makes fabulous plantain chips, plain or with garlic flavor. Then cook your favorite rice, mix up your favorite Mojito recipe (a must), plus have some beer on hand,  and you are all set! Light some candles, play some Cuban music, and let the yum begin!!


Look how happy we made Ricky! Aww...


Sunday, January 9, 2011

Pumpkin Donut Muffins


Donut Muffins seem to be one of the latest trends on the "foodie" runway these days. I am blogging about these donut muffins in particular for a few reasons.

1)My niece Mel made them on vacation and the entire batch disappeared immediately. 2) I love pumpkin!
3)Believe it or not, they're made with several ingredients that are very GOOD FOR YOU!

FOR INSTANCE, they contain:
Coconut oil: Coconut oil is rich in lauric acid, which is known for being anti-viral, antibacterial and anti-fungal. Coconut oil is also being used by thyroid sufferers to increase body metabolism, and to lose weight. Virgin coconut oil is also used for making natural soaps and other health products, as it is one of the healthiest things one can put on their skin.

Pumpkin Puree: The alpha-carotene and beta-carotene are potent antioxidants found in pumpkin and are pro-vitamin A carotenoids, meaning the body converts them to vitamin A. Vitamin A promotes healthy vision and ensures proper immune function. The beta-carotene in pumpkin may also reverse skin damage caused by the sun and act as an anti-inflammatory. Alpha-carotene is thought to slow the aging process and also reduce the risk of developing cataracts and prevent tumor growth. Carotenoids also boost immunity and lessen the risk of heart disease.

Buttermilk:  Buttermilk is lower in fat than regular milk, because the fat has been removed to make butter. It is also high in potassium, vitamin B12, calcium, and riboflavin as well as a good source of phosphorus.
Cinnamon: Cinnamon has a regulatory effect on blood sugar, has shown an amazing ability to fight yeast infections, it has an anti-clotting effect on the blood, is a natural food preservative, and a great source of manganese, fiber, iron, and calcium.

(If you know of any other health benefits of these ingredients, PLEASE feel free to share them with us in the comments section!)


In addition, Mel used mostly Organic ingredients. The health-worthiness of these yummy little numbers are seriously off the hook!

Pumpkin Donut Muffins
Makes about 15

10 tablespoons Organic Coconut Oil , softened
3 cups all purpose flour
2 1/2 teaspoons baking powder
1/4 teaspoon baking soda
1 teaspoon sea salt
1/2 teaspoon ground nutmeg
1/4 teaspoon ground allspice
1/3 cup buttermilk
1 1/4 organic (or traditional) pure pumpkin puree (from 15 oz can)
3/4 cup organic (or traditional) light brown sugar
2 large eggs

Sugar Coating:
3/4 cup sugar in the raw/turbinado (or traditional sugar)
2 1/2 teaspoons ground cinnamon
1/4 cup Organic coconut oil, melted
Directions:
Preheat oven to 350 degrees. Spray muffin cups with non-stick cooking spray, then coat each one with flour.

In a medium bowl, whisk together flour, baking powder, baking soda, salt, nutmeg, and allspice. In a small bowl, whisk together buttermilk and pumpkin puree. In a large bowl mix together the coconut oil and brown sugar until thoroughly mixed. Beat in eggs, one at a time, scraping the sides of the bowl as needed. Alternate adding flour mixture with pumpkin mixture, little by little, until well blended.
Spoon a small amount of batter (about 1/3 cup) into each muffin cup. Bake until toothpick inserted in center comes out clean, about 30 minutes. Meanwhile, in a medium bowl, combine the turbinado sugar with cinnamon.
Let muffins cool 10 minutes in pan on a wire rack. One at a time, remove muffins from from pan, brush all over with coconut oil, then toss to coat with cinnamon sugar mixture. Let the "Donut Muffins" cool completely on a wire rack.

            Then dig in!! They're perfect with a hot cup of coffee, tea, or hot chocolate.

Monday, November 15, 2010

Product Review: CIAO BELLA Gelato


If you have ever been to Italy and had the pleasure of tasting real, authentic gelato, then you understand why this post is ALL ABOUT gelato! Gelato is the Italian version of what we call ice cream...its smooth texture and intense flavor is beyond amazing.

We went to Europe in 2006, but I had since forgotten all about gelato and how much I loved it. Then, some members of my family went to Sicily this past summer, and my niece Melissa raved about how fabulous the gelato was. She suggested I include a recipe in my blog for "gelato in brioche" which is how they enjoyed it in Sicily. Great idea!! I thought to myself, hey, I've made ice cream many times before...so how hard could it be to make gelato?

I did a little research, and gelato in brioche is similar to an ice cream sandwich. Here is a photo of what it looks like.
(Um, I think this is one of the best looking sandwiches I have ever seen.)

 I found several recipes for gelato. Hmm, they all definitely looked more complicated than the ice cream recipes I've tried. Then as I read on, I learned that there are a few key differences between gelato and ice cream.

 Ice cream usually has a minimum of 10 percent fat, whereas gelato is made with more milk than cream, so it contains more like 5 to 7 percent fat. Gelato is also churned at a slower speed than ice cream, so it's denser because not as much air is whipped into the mixture.   This meant that my treasured ice cream maker would probably churn too fast for making gelato. Drat, drat and double drat.

 I found myself very discouraged about making gelato. On the other hand, I was also suddenly very hungry for gelato at the same time! I must have gelato! Where could I find some, right away!?  

To my great relief, I found that there is fabulous gelato available right here in good old New Jersey! Ciao Bella (which means, “hello beautiful”) began their Gelato making adventure in Little Italy, NY in 1983. They started out as a tiny storefront selling custom flavors to white-tablecloth restaurants in downtown Manhattan. Ciao Bella quickly became an overnight sensation! Their company grew, and then Ciao Bella’s factory and business offices moved in 1999 to 40th Street in Irvington, NJ. That's right, New Jersey!

 This sought after product rings true to the Italian tradition of simplicity and great ingredients. Ciao Bella uses imported Italian machines to churn out gelato that duplicates the authentic flavor and dense texture found at gelato stands in Italy. So if you want to try something amazing, treat yourself to a pint of Ciao Bella. Here is a link to find stores in your area that carry it: http://www.ciaobellagelato.com/#/store-locator

I headed out to the nearest Grocery store that carried Ciao Bella. I was hoping so much that they had Hazelnut...and indeed they did.  They had lots of other flavors as well, and so far we have tried the Roasted Hazelnut, Tahitian Vanilla, Espresso, and (my personal favorite) Key Lime Graham

Hello.... I dont think we will be going back to traditional ice cream anytime soon! They have several other varieties as well as some wonderful sorbets (so far we have tried the coconut). Give Ciao Bella a try if you haven't already. You won't be sorry!
Ciao!