Showing posts with label Side Dish. Show all posts

Tuesday, February 26, 2013

FAVORITE CHICKEN & FAR EAST SLAW

FAVORITE CHICKEN & FAR EAST SLAW

Um, Hi Everybody!! I know, I know, you are probably saying "Fifi who?" Well, it's true, I have finally recovered from a very severe case of writer's block. I am back to blogging!

I figured I would jump start my food blog again with two recipes, one that I have been making for 25 years, and one that I made for the first time last week. Both are super easy and yum.

We call this "Favorite Chicken" in our house because it tastes sooo good & goes with almost any side dish. Plus the leftovers taste superb cold (a good "grab and run out the door" lunch) as well as in a sandwich with roasted peppers and mozzarella, or even sliced up over a salad. I usually make a big batch so that we have extra during the week. It's even tasty enough to serve to dinner guests, especially with hot peppers or chimichurri. :-)

Ingredients:
2 pounds of boneless, skinless chicken breast pounded and cut into serving size portions
2-3 eggs, whisked in a mixing bowl
2 cups of Italian bread crumbs in a mixing bowl
olive oil
vegetable oil


Heat about 1/3 cup of both oils together in a large fry pan. Let the oil get really hot. Meanwhile, thoroughly immerse the pounded chicken into the eggs. Let the excess drip back into the bowl. Then, dip into the bowl of bread crumbs, completely coating the piece of chicken. Place in sizzling oil in fry pan. Fill pan with pieces of chicken and let each piece slowly brown, thoroughly on each side. Once cooked, remove each piece and place on serving platter. That's it! You wont believe how juicy and tasty it will be.

Next I will tell you about Far East Slaw. You see, we use crushed red pepper at the dinner table quite often, so I buy a large container of it at Costco.
On the back of the container, McCormick lists a recipe for Far East Slaw. So one night the family was like "When are you gonna make this Far East Slaw?! We wanna taste it!" (which is understandable since they have sat there and looked at the recipe so many times while eating). I went out and got the ingredients, and made it the very next night, changing a few things to my liking. Another easy and delicious recipe! It definitely has a distinct Asian taste to it. Next time I think I will add cooked chicken breast and sesame seeds, and serve it as a main course salad.
Ingredients:
1 (16 oz) bag of fresh coleslaw mix
1 cup of chopped radishes
1/3 cup rice vinegar
2 tablespoons vegetable oil
1/2 teaspoon salt
1/2 teaspoon garlic powder
1/4 teaspoon ground ginger
1/4 teaspoon crushed red pepper

Mix all ingredients together, toss and refrigerate. Serve cold.

So there you have it folks! Something old, something new, everything Fifi-tastic! Thanks for following my blog and I promise to keep sharing Fabulous things with all of you, my Foodie Friends! XOXOX

Monday, September 26, 2011

Gotta Love Zucchini...Why and How


\
Believe it or not, zucchini is botanically a fruit! However, in gastronomic terms, it is considered to be a vegetable. This cylindrical-shaped fruit has many nutritional benefits, and is low in calories! One medium-sized zucchini has just 25 calories in it, making it an ideal stomach-filler for those trying to lose weight. It is rich in Vitamin C, which is a powerful antioxidant and has anti-inflammatory properties. It's also a good source of vitamin B6, riboflavin, manganese and a lot of other nutrients. Gotta love zucchini!

There are many ways to enjoy this nutritional treat. You can use it in place of cucumbers in a green salad. You can slice it up and eat it with dip.
You can also make Zucchini Fries, Mmm!
Zucchini Fries are a great alternative to traditional, potato fries. Try them alongside a burger or panini sandwich.
Another option is to make Zucchini Cheese Squares.
 When I was a kid, my Mom always served Zucchini Cheese Squares piping hot, with Chicken cutlets. Then we would eat the leftovers the next day, as breakfast, lunch or a snack, right out of the refrigerator. Below you will find the recipe for both of these fabulous side dishes!

Zucchini Fries
2-3 fresh zucchini (depending on size)
3 eggs
2 cups Panko crumbs

Preheat oven to 400 degrees. Slice up the zucchini (skin on) in long strips, not too thin but not too thick. (Think steak fries.)
Crack the eggs into a bowl and stir until mixed well. Dip the zucchini slices in the egg and then the Panko crumbs. Make sure they are coated well and then place on well greased cookie sheet. Sprinkle the leftover Panko crumbs on top and place the cookie sheet in the oven.
Bake for 20-30 minutes, checking occasionally.  Briefly turn the oven to Broil and let them crisp up before removing from the oven. Let cool for a few minutes, and serve!
Zucchini Cheese Squares
3 large zucchini, thinly sliced
1 large onion, chopped
2 cloves of garlic, minced
2 tablespoons olive oil
8 eggs
4 tablespoons milk
1/2 cup seasoned bread crumbs
2 teaspoons dried oregano
2.5 cups shredded cheddar cheese
salt and pepper to taste

Preheat oven to 325 degrees. Saute zucchini, onion, and garlic in oil for 5 minutes.
Beat together the eggs, milk, bread crumbs, and seasonings. Add cheese to mixture, then gently stir in zucchini mixture.
Bake in a greased 9x13 baking dish for 35 minutes. Make sure the top is golden brown before removing from oven. Let cool slightly and cut into squares. Serve!
 I hope this post has inspired you to eat more zucchini and reap the health benefits, as well as enjoy the taste!! Ciao!


Tuesday, July 26, 2011

Quick Bites: Black Bean & Corn Salad

Hi Y'all!
I desperately  need to tell you about a quick and easy salad that is perfect for summer BBQs, and it lasts in the fridge for several days so it's great for a leftover lunch on the go. Plus it doesn't hurt that it is a major crowd pleaser.

So easy! You pretty much throw all the ingredients together, chill it in the fridge, and it is ready to serve. Here are the ingredients:

2 cans of black beans, drained
2 cans of corn, drained
2 pints of grape tomatoes
1 red onion, chopped
2 avocados, skinned and cut into small pieces
1 bunch of fresh cilantro, washed and chopped
juice of 2 fresh limes
Olive Oil, Balsamic Vinegar, Salt & Pepper, to taste

Stir all ingredients together, and cover and chill in fridge for at least an hour. So yummy!!! Not to mention that it's full of healthy ingredients.

Enjoy and stay tuned... my next post is about a grilling concoction that will BLOW YOU AWAY!
Love, Fifi


Saturday, June 25, 2011

PASTA RAPIDO! Quick & Delicious

Whew! I just got over a terrible case of writer's block. Sorry!

I hope this yummy, easy recipe will make up for it. It's called Pasta Rapido, and I've been cookin' this stuff for at least 20 years. I usually make it as a side dish for breaded chicken cutlets, but it's hearty enough to stand on it's own if you prefer.

You know where I got this recipe from? One of those good old fashioned Sunset paperback cookbooks. The collection of  Sunset cookbooks definitely fall into the "oldie but goodie" category. You may want to pick one up if you see any at a yard sale this summer.
PASTA RAPIDO

1/2 cup olive oil
2 small dried hot red chilies, broken into pieces
3or 4 cloves of garlic, minced or pressed
3/4 teaspoon salt
1 bunch fresh parsley, chopped (I usually use Italian parsley, but we had some fresh curly parsley from the garden so I just used that this time, and it tasted just as good)
1 lb your favorite pasta (we like thin spaghetti)


Start salted water boiling for pasta. Then heat olive oil over low heat in medium saucepan. Add chilies and cook until they begin to brown.


Add garlic and cook for about 30 seconds or until limp (do not brown). Add salt and parsley and cook, stirring occasionally, for a few minutes more. Remove from heat.

Your water for the pasta should be boiling by now, so add the pasta and cook until Al dente. Drain, toss with your freshly made mixture of parsley goodness, and it is ready to serve. We always like it topped with a few shakes of Parmesan cheese. 

                                  It's quick ("rapido"), easy, and delicious! Mangia!

Friday, March 18, 2011

The Best Darn Guacamole

Many years ago when we brought our first baby home from the hospital, I remember feeling like a total zombie. I was sore, sleep deprived, and somewhat overwhelmed with this "new chapter" in my life...called Motherhood.

Recently, my sister in law Darlene had a new baby. When we went to visit, I thoroughly expected to find her feeling the same way I did as a new mom. Boy, was I surprised.....

She not only looked and felt fabulous, but her house was immaculately clean. Plus, she was able to dish out the most magnificent guacamole I have ever tasted!! She has kindly shared her recipe with me.
Best Darn Guacamole

Ingredients:
3 avocados – peeled and pitted
3 limes
1 teaspoon salt
1/2 cup diced onion
3 tablespoons chopped fresh cilantro
2 tomatoes, diced (preferably Roma)
1 teaspoon minced garlic
1 teaspoon minced jalapeno
1 teaspoon fresh salsa
Pepper to taste

Directions:
In a medium bowl, mash together the avocados, lime juice, and salt. Mix in onion, cilantro, tomatoes, garlic, and jalapeno. Stir in salsa. Season with additional salt and pepper to taste. Serves 4-5.

     She made two batches for us, and we INHALED it all. It tastes great on burgers too, by the way!

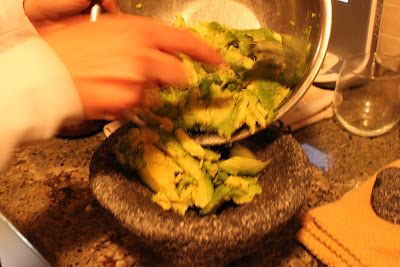
 I was also enamored with the super cool Molcajete she served it in. It's made from volcanic rock! You don't need a Molcajete to make this delicious guacamole, Darlene just used a regular bowl and spoon. It does however, make for a very authentic presentation, and it serves as very fuctional kitchen tool as well. I have seen them for sale on the Williams-Sonoma website.

Warning: Make sure you have lots of tortilla chips on hand when you try this recipe! 
This is Miley. Miley agrees that yes, this is indeed the best darn guacamole.

Tuesday, January 25, 2011

Who's Got Cabin Fever?


OK Peeps, who out there isn't feeling just a tad bit "doughy" lately... with all this blustery weather, darkness, blah blah blah??? I for one, am feeling it for sure! I just want to wear a big sweater, socks and slippers until say... April. (along with a warm cup of herb tea and a hot water bottle......C'mon, you KNOW that sounds GOOD!) But that may not be a viable option...

 So anywhoo, my Plan B is to think positive, enthusiastic, and festive thoughts! Let's have a Cuban Dinner Party!!!


Many years ago when I had my first Mojito....it was in South Beach Miami, Florida, where you can easily find authentic Cuban cuisine. Ever since then, (when I also fell in love with the Traditional Cuban Sandwich,) I have been experimenting, and putting together a foolproof menu for an awesome Cuban dinner. It's a great way to feel "warm & tropical" in the dead of winter. It makes a very nice Superbowl menu, too! Ricky Ricardo would be proud.


CUBAN DINNER PARTY MENU
Mojitos
Cuban Sandwiches
Cuban Salad
Black Beans & Rice
Garlic Plantain Chips 
Tres Leches Cake
For Cuban Sandwiches:
1 lb. deli ham, sliced thick
1 lb. roast pork, sliced thick (You can roast & slice it yourself if you cant find it at your deli)
1 lb. Munster cheese
8 submarine rolls, split
Jar of Dijonnaise mustard
Dill pickles, sliced lengthwise (you can usually find them jarred this way in the grocery store)
Butter, softened

Butter both sides of submarine rolls, then put mustard on one side of each roll. Layer Ham, Pork, Cheese and Pickle slices onto rolls. Then top with the other half of the roll.

Cuban sandwiches can be cooked using a Panini/Grill Press, a George Foreman Grill, or even just a skillet.

If you are using a skillet, butter the bottom of the skillet and place sandwiches into skillet. Then weigh it down with another skillet (cast iron if you have it). Rolls should be golden brown and cheese should be melted. Let cool for one minute, slice and transfer to serving platter.

Easy Cuban Salad:
Baby Lettuce Greens
Avocado slices
Thin red or yellow onion slices
salt
olive oil
lime juice
Arrange a bed of lettuce leaves, slice on avocado, onion, salt, olive oil, and a squeeze of lime juice. All these ingredients are to taste, so you can flavor it up or down to your liking.

Tres Leches Cake:
2 cups cake flour
2 tsp baking powder
1/2 tsp salt
6 large eggs, separated
2 cups granulated sugar
2 teaspoons vanilla extract
1/2 cup whole milk
1 14oz. can sweetened condensed milk
1 1/4 cups heavy cream
1 14 oz can evaporated milk
2 tablespoons light rum
Spray bottle of whipped cream
Cinnamon for sprinkling
Maraschino cherries (optional)

Preheat oven to 350 degrees. Grease and lightly flour a 9 x 13 baking dish. Stir flour, baking powder and salt together.
Separate the egg yolks from the whites. Beat the whites until very foamy and frothy. Set aside.
In large mixing bowl, cream the sugar, egg yolks, and vanilla extract with an electric mixer. Continue mixing and slowly add the milk. Then start adding the flour mixture, a little at a time until all the flour is incorporated and and the batter is smooth. Finally, use a spatula to gently add the beaten egg whites until completely mixed.
Pour batter into floured and greased baking dish. Bake for 40-45 minutes, or until a toothpick stuck in the middle comes out clean. Allow cake to cool on wire rack for 10 minutes.
Then invert the cake onto a baking tray with a raised side, (something to catch the syrup.) Repeatedly pierce the top of the cake with a fork.

Milk Syrup: Whisk together the sweetened condensed milk, evaporated milk, heavy cream, and rum in a bowl until well blended. Pour syrup over cake a little at a time, until it soaks through the cake. Use your fork to enable the syrup to seep into the cake. There will probably still be a pool of syrup around the bottom of the cake, but it will gradually soak in. Cover the cake in plastic wrap and refrigerate for at least 3 hours, preferably overnight.
When it's time to serve, slice a square piece of cake, spray with whipped cream, sprinkle with cinnamon, and top with a cherry (optional). You will not believe how good this cake tastes.


 As for the rest of the menu, it's all stuff you can purchase! You can also eliminate an item or two if you would rather do a little less work. Here are some tips: I buy canned Black Bean soup, heat it up, and drain off the excess liquid for my black beans.I serve it in a bowl alongside some white or brown rice. They are side dishes that compliment the sandwiches perfectly.  Goya makes fabulous plantain chips, plain or with garlic flavor. Then cook your favorite rice, mix up your favorite Mojito recipe (a must), plus have some beer on hand,  and you are all set! Light some candles, play some Cuban music, and let the yum begin!!


Look how happy we made Ricky! Aww...


Friday, December 17, 2010

Salt Roasted Fingerling Potatoes

Yay! Our friend Beth was coming to dinner, and bringing her famous homemade applesauce!! What could I make that would compliment Beth's
"always tasty" concoction? I settled on  Pork Loin w/Whiskey Maple Sauce, Sauteed Spinach, and Potatoes. But not just any potatoes...I dug out an old recipe I learned at The Gingercreek Cooking School (in Stewartsville, NJ) for Salt Roasted Baby Potatoes. This luscious recipe is a simple combo of Sea Salt, Olive Oil, Butter and Parsley. I had forgotten how good it was! I bought a bag of potatoes that was a mixture of Fingerling and Baby potatoes (at Costco) but you can use any small potatoes that you would like. It's an easy yet elegant side dish that is perfect for many different entrees!! Our fireside dinner turned out great. I can still taste Beth's Applesauce....mmm. But you will have to get that recipe from Beth yourself. ;-)


SALT ROASTED FINGERLING/BABY POTATOES

2 lbs. baby or fingerling potatoes
about 1 cup course crystal sea or kosher salt                
2 tablespoons butter
4 tablespoons high quality extra virgin olive oil
(I used garlic infused, see photo)
1 bunch Italian flat leaf parsley, washed and snipped


Preheat the oven to 375 degrees. Pour the salt into the bottom of a shallow baking pan. Wash potatoes and pat dry. Place them on the bed of salt.


With the point of a knife or fork pierce the skin of each potato once. Bake 60 minutes or until tender. Transfer potatoes to a bowl, cut each potato in half (or in quarters) and smash slightly with the butter. Add salt & pepper to taste (some of the sea salt will cling to the potatoes from the baking) then drizzle with olive oil. Gently stir/toss in the snipped parsley. Serve! Absolutely, totally yum...

Sunday, December 12, 2010

Mediterranean Deliciousness!


Mediterranean food is a definite favorite in our household! Our good friends the Yilmaz's have tought us a lot about the fabulous "eats" there are to choose from, and one of our best loved dishes is Kofta. "Kofta" is a turkish meatball made with beef or lamb, (or both). It can be grilled, baked or pan fried.

So after many years of enjoying the way my friend Elvin makes it, I finally decided to give it a try myself.  Last night we enjoyed Kofta with a fresh Middle Eastern Chopped Salad, Tzatziki sauce (gotta love that stuff), some rice, and warm pita bread. It was an easy meal to make, and it tasted stupendous!

A wine reccomendation would be our favorite turkish red, YAKUT Kavaklidere http://internationalcellar.com/r/products/kavaklidere-yakut-2007/ . Its perfect with this meal.

If you have a hankering for dessert, how splendid would some homemade (or store bought) baklava be?!

Yummy yummy.... Here are the recipes for both the Kofta and the Chopped Salad. They serve 6...with a little leftover (or maybe not) ;-)

TURKISH KOFTA

3 cups fine breadcrumbs
3 lbs lean ground lamb                                    
1.5 tsp salt
1.5 tsp pepper
3 tsp ground cumin
1.5 tsp allspice
2 tsp dried mint or dill
6 cloves garlic, chopped
one onion, chopped
6 tablespoons fresh parsley
3 eggs
3 Tbsp. olive oil

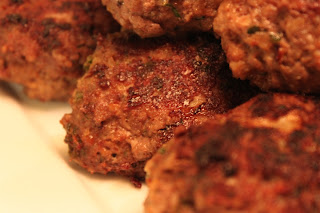
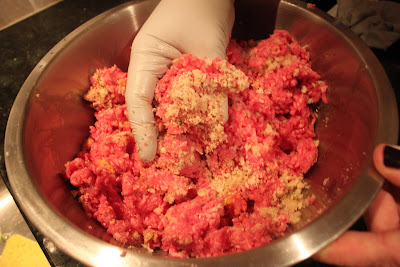
Using a food processor (or using plastic gloves and your hands like I did) Combine the breadcrumbs, lamb, and the eggs until mixed well. Then add the spices, garlic, onion, and parsley. Mix very thoroughly. Form into longish meatballs (see photo).
Then pan fry them in the olive oil until they are fully cooked, turning occasionally. You can also try grilling them or cooking them in the oven, if you prefer. Just be sure they are fully cooked on all sides. Then they are ready to serve!


MIDDLE EASTERN CHOPPED SALAD

(this recipe is taken from the book Eating Well For Optimum Health by Dr. Andrew Weil)

2 cucumbers, peeled and diced
4 fresh tomatoes, seeded and diced
4 scallions, trimmed and chopped                                   
1 sweet yellow or green pepper, seeded and chopped
6 Tbsp pitted and chopped Kalamata Olives
4 Tbsp fresh parsley, chopped
6 tablespoons fresh lemon juice
4 tablespoons extra virgin olive oil
salt and black pepper to taste
1/2 cup (or more) of feta cheese, crumbled

Combine all ingredients. Season to taste with salt and pepper and serve.


Tuesday, November 23, 2010

Macaroni & Cheese...a family classic

Many years ago, when I was just getting to know my husband and his family, I learned that one of their favorite family dinners was homemade macaroni and cheese. Traditionally, they would serve it with tomato juice on the side, and a shredded cabbage salad. That's it. That was the whole meal.

This was puzzling to me at first, coming from my Italian/American background. (I was like: "Don't they serve meatballs, or a turkey, or something with it?") And then, the idea of pouring tomato juice over the macaroni was almost more than I could handle. They all assured me that I would like it though. And what else was I gonna do besides give it a try, right?

Well from the first time I tried it, I was smitten. To me, this truly was classic, American comfort food AT IT'S BEST! The crispy top along with the cheesy, buttery inside melted in my mouth. And as hard as it was to admit, I immediately became hooked on how the flavor of the tomato juice (preferably Sacramento) mingled so nicely with the cheese!

This dish continues to be a family tradition. My mother in law Barbara still makes it the best. But I make it too, quite often. And when I do, I double the recipe, because everyone goes back for second and thirds. Then we have the rest for breakfast or lunch the next day (it's that good). So here it is, from our family, to yours!

MIMI'S MAC N' CHEESE

1 to 1.5 lbs sharp cheddar cheese
1 stick unsalted butter
1 pound elbow macaroni
milk (I will explain how much later)
salt and pepper to taste
1 large can of Sacramento tomato juice

 CABBAGE SALAD
Mix together and toss:
1/2 head cabbage, finely shredded
1/2 onion, sliced thinly
veg. oil, apple cider vinegar, salt and pepper (all mixed together to your taste, as a dressing)

Macaroni & Cheese instructions:
Cook the pasta, draining and cooling RIGHT BEFORE you would consider it "al dente". It will finish cooking in the oven. Melt the butter, shred the cheddar cheese, and toss them both with the warm pasta. ( I should tell you that Barbara thinly slices both the butter and cheese instead of melting/shredding them, and tosses them into the pasta that way.)

Next, place the mixture into a baking pan, and add salt and pepper to your taste. Top with additional cheddar cheese.

Next is a critical step: add milk until the bottom of the baking pan is filled about 1/3 of the way up (see photo).

Then bake in a 350 degree oven for about 30 minutes. Broil for about 30 seconds before removing from oven if you like the top crispy like we do. Warm the tomato juice and serve in a gravy pitcher at the table. Enjoy with cabbage salad and big smiles, guaranteed!